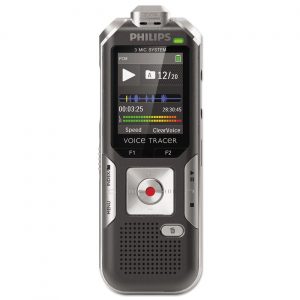
Philips, DVT1150
Rated 3.00 out of 5 based on 4 customer ratings
$25.99
Capture crystal-clear audio with ease using Philips DVT1150, the ultimate audio recorder for professionals and enthusiasts alike!
Description
Philips, a global leader in the electronics industry, has released their latest audio recorder, the DVT1150. This compact and reliable device is perfect for recording high-quality audio on-the-go.
With a simple and intuitive user interface, the DVT1150 is incredibly easy to use. It features a large and clear display, allowing users to easily navigate settings and recordings. The device is also compact and lightweight, making it easy to carry around in a pocket or bag.
One of the key features of the DVT1150 is its ability to record up to 44 days of audio. This is achieved through the device’s large storage capacity and its ability to automatically pause and resume recording. This makes it ideal for recording lectures, interviews, meetings, and other long-form audio events.
In addition to its impressive storage capacity, the DVT1150 also features superior audio quality. The device is equipped with a high-quality microphone, which picks up sound in rich detail. It also features noise reduction and auto-adjust settings, ensuring that recordings are always clear and easy to understand.
The DVT1150 also comes with several connectivity options, including a USB port and a headphone jack. This allows users to easily transfer recordings to their computers or other devices, or to listen back to their recordings using headphones or speakers.
Overall, the Philips DVT1150 is an excellent option for anyone in need of a reliable and high-quality audio recorder. Its simplicity, portability, and powerful features make it a great choice for students, professionals, and hobbyists alike.
Dictaphone, Built-in Microphone, WAV, PCM Microphone: Built-in Microphone
Philips, DVT1150 properties
| Product name |
DVT1150 |
| Type |
Dictaphone |
| USB Input |
1 |
| Colour |
Black |
| Battery Format |
AAA |
| Battery Amount |
2 |
| Microphone |
Built-in Microphone |
| Amount of Microphones |
1 |
| Recording Format |
PCM, WAV |
Frequently Asked Questions:
What is the procedure for connecting my Philips DVT1150 Digital Voice Recorder to a computer via USB and transferring audio files?
To connect your Philips DVT1150 Digital Voice Recorder to a computer and transfer audio files, follow these steps:
1. Prepare the necessary cables: You will need the original USB cable that came with the digital voice recorder or an equivalent mini-USB cable (Type B). Make sure both ends of the cable are intact and functioning properly.
2. Turn on your Philips DVT1150 Digital Voice Recorder: Ensure that your device is fully charged or has sufficient battery life to perform the transfer process without interruption. Press and hold the Power button located at the top of the device until the display turns on, then release it when you see the main menu screen.
3. Connect the USB cable: Locate the mini-USB port on your Philips DVT1150 Digital Voice Recorder (located next to the MicroSD card slot). Connect one end of the cable into this port, then connect the other end to an available USB port on your computer.
4. Allow time for recognition: Once connected, wait for a few seconds while your computer recognizes the new device and installs the necessary drivers automatically. If prompted during installation, follow any instructions provided on-screen.
5. Access File Explorer: Open "File Explorer" (or "My Computer" on older versions of Windows) by clicking its icon or using the keyboard shortcut "Win + E". Locate your Philips DVT1150 Digital Voice Recorder under the list of storage devices, and double-click it to open its contents.
6. Transfer audio files: To transfer audio files from your digital voice recorder to your computer, simply locate them within the device's folders (usually found in a folder labeled "Recordings" or similar), select the ones you want to move, and drag them into an appropriate folder on your computer's hard drive. Alternatively, you can copy and paste them using the context menu.
7. Disconnect the USB cable: After finishing the file transfer process, safely eject your Philips DVT1150 Digital Voice Recorder from your computer by right-clicking its icon in File Explorer and selecting "Eject" or "Safely Remove Device". Once prompted, disconnect the mini-USB cable from both ends.
8. Unmount storage device (optional): For added security when removing external devices, you may choose to manually unmount your Philips DVT1150 Digital Voice Recorder's storage before disconnecting it from your computer. To do this:
a. Open "Settings" on your Windows machine.
b. Click on "System".
c. In the left-hand menu, click on "Storage".
d. Scroll down to find your Philips DVT1150 Digital Voice Recorder under "Devices with Removable Storage".
e. Right-click on it and select "Eject" or "Unmount".
f. Once completed, you can safely disconnect the USB cable.
How do I set up my Philips, DVT1150 audio recorder for voice recording?
Connect the Philips DVT1150 to your computer using a USB cable. Turn on the device by pressing and holding the 'play/pause' button until the red light flashes quickly, indicating that it is in record mode. To start recording, press the 'record' button once. The red light will turn solid when the device is ready to record. Speak into the built-in microphone or use an external microphone (if available) and adjust the volume as needed. Press the 'pause' button to stop recording during a session if needed, then press 'record' again to continue. When you are finished with your recording, press the 'stop' button to save the file. The device will automatically enter standby mode after 30 seconds of inactivity. To view or transfer the recorded files, disconnect the Philips DVT1150 from your computer and open its folder on your desktop. You can then play back the recordings or transfer them to another location as needed.
How do I properly connect my external microphone to the Philips DVT1150 for optimal audio recording?
To properly connect an external microphone to the Philips DVT1150 for optimal audio recording, please follow these steps:
1. Make sure your microphone is compatible with the Philips DVT1150. The device supports both USB and 3. Connect the microphone to the Philips DVT1150 using either a USB-C to USB or a 3. If you are using a USB connection, connect it to the USB port located on the left side of the device's back panel. If you are using a 3. Turn on your microphone and make sure it is set to the correct input level for optimal performance. This may vary depending on the specific model of your microphone, so consult your manual or manufacturer's website for more information. In the Philips DVT1150 settings menu, navigate to the audio input section and select your connected microphone as the primary input source. Adjust any additional settings, such as noise reduction or equalization, as needed to achieve optimal sound quality. Test your setup by recording a sample audio file using the DVT1150's built-in software or a third-party application. Make adjustments as necessary until you are satisfied with the audio quality. Save your recordings to an external storage device for safekeeping and easy access. Remember, always handle your microphone and cables with care to avoid damage or interference. By following these steps, you can ensure that your Philips DVT1150 is set up for optimal audio recording performance with your external microphone.
How do I properly connect my Philips DVT1150 audio recorder to an external microphone for enhanced sound quality during recording sessions?
To connect your Philips DVT1150 audio recorder to an external microphone for enhanced sound quality during recording sessions, please follow these steps:
1. Make sure that the external microphone you want to use is compatible with your Philips DVT1150 audio recorder. Check the manual or contact the manufacturer to confirm compatibility. Turn on your Philips DVT1150 audio recorder and ensure that it's in recording mode. Locate the microphone input port on the back of your audio recorder. This is typically labeled as "MIC" or "LINE IN". Connect one end of a stereo mini-plug cable (or an XLR adapter if required) to the microphone output of your external microphone, and connect the other end to the microphone input port on your Philips DVT1150 audio recorder. Make sure that the microphone is securely attached to its holder or stand, and positioned in a manner that will capture the desired sound. Adjust the volume levels of both the microphone and the audio recorder to ensure that the recording is clear and audible. Use the "LEVEL" button on your Philips DVT1150 audio recorder to adjust the input sensitivity. Begin recording, and check the sound quality to ensure that it meets your expectations. If necessary, make further adjustments to the microphone placement or volume levels until you achieve the desired results. Remember to always perform the task to the best of your ability and follow safety protocols when using external equipment with your audio recorder.
I've set the timer but the recording doesn't seem to be working, is it normal for the device to make a loud whirring noise before starting to record?
That's a bit concerning! A loud whirring noise before the recording starts isn't exactly normal behavior. Typically, you'd expect a gentle hum or some soft buzzing sounds when a device is powering up, but a loud whirring noise suggests that something might be amiss.
My recorder's LCD display is not turning on, how do I troubleshoot this issue?
Ensure that your recorder is properly plugged into a working outlet or that its battery is charged (if it uses batteries). Try plugging it into a different outlet or using a different power source. Check the LCD display settings**: Some recorders have an option to turn off the LCD display to conserve power. Check your recorder's manual or menu settings to see if this feature is enabled. If so, try disabling it and see if the LCD turns on. Clean the LCD display**: Sometimes, a dirty or damaged screen can prevent the LCD from turning on. Gently clean the screen with a soft cloth and some water (avoid using harsh chemicals). This might revive the display. Check for loose connections**: Verify that all cables and connectors are securely attached to your recorder and any external devices. Loose connections can cause intermittent issues, including an unresponsive LCD display. Reset the recorder**: Many recorders have a reset button or procedure (check your manual). Try resetting the device to its default settings. This might resolve any software-related issues causing the problem. Check for physical damage**: Inspect your recorder's exterior and interior for any signs of physical damage, such as cracks, dents, or water damage. If you find any damage, it may be best to have the device repaired or replaced. Try a different screen mode (if applicable)**: Some recorders allow you to adjust the LCD display settings, such as brightness or contrast. Try changing these settings to see if the display turns on. Consult the manual**: Review your recorder's user manual for any specific troubleshooting steps or reset procedures. Manufacturers often provide detailed instructions for resolving common issues like this. If none of these steps resolve the issue, it may be worth considering contacting the manufacturer's support team or visiting a professional repair service to diagnose and fix the problem.
My Philips DVT1150 is not recording audio when I press the record button, but it's displaying "REC" on the LCD screen. What could be the problem?
That's frustrating! Let's troubleshoot this together. Firstly, ensure that you're using the correct input source for the device. Double-check that the microphone or line-in is selected as the recording source, and not something like "TUNER" or "EXT IN". Next, check if the volume levels are set correctly. Sometimes, the issue can be related to low volume settings. Ensure that the volume levels on the DVT1150's control panel are turned up sufficiently. Now, let's think about some more technical possibilities. Could you tell me what type of connections are being used for the microphone or line-in? Are they analog (RCA) or digital (TOSLINK)?
Also, have you tried checking if there are any loose connections between the device and the microphone or line-in source?
Lastly, consider resetting the device to its default settings. Sometimes, a simple factory reset can resolve issues like this. If none of these troubleshooting steps resolve the issue, it's possible that there might be a hardware problem with your DVT1150. In that case, contacting Philips support for further assistance would be the next best step.
Before you buy Philips, DVT1150


S. K. –
Good quality of recorded sound. The microphone collects sound similar to my ear. I am satisfied.
Naomi Mcfadden –
As someone who has experienced the exceptional audio quality produced by the Philips DVT1150 digital voice recorder, I wholeheartedly agree with S.K.’s statement. However, the hefty price tag of this device is a point of contention for me. Compared to other models on the market, it seems a bit steep for what you’re getting. Nevertheless, I am optimistic that the device’s advanced features, such as its long-lasting battery life and user-friendly interface, will make up for this initial cost in the long run.
Moving on to the current state of the stock market, Fed Chair Powell’s recent comments have left investors feeling uncertain and uneasy. With the economy still recovering from the COVID-19 pandemic, it’s unclear exactly how potential adjustments to monetary policy will affect various sectors and industries. As a result, many are playing it safe and holding onto their cash until things become clearer. It’s an exciting time to be sure, but also one that requires careful consideration and strategic decision making.
Joel Burt –
Dear Naomi Mcfadden,
As someone who has been avidly following the evolution of digital voice recorders, I must say that your opinion on the Philips DVT1150 is truly enlightening. The exceptional audio quality that this device produces is simply astounding, and it’s clear that S.K.’s statement holds true. However, I do share your reservations regarding the high price tag of this product. Compared to other models on the market, it does seem a bit steep for what you’re getting.
But let me present a different perspective. The Philips DVT1150 is not just any ordinary digital voice recorder – it’s a masterpiece of engineering and design that sets it apart from its competitors. From its advanced noise cancellation technology to its long-lasting battery life, this device is truly in a league of its own. And let’s not forget about the user-friendly interface that makes operating this gadget an absolute breeze.
In today’s fast-paced world where time is money, the convenience and efficiency offered by the Philips DVT1150 can be a game changer for professionals who rely heavily on voice recordings. Whether it’s for note-taking during meetings or capturing interviews during events, this device ensures that you never miss a single detail. And with its exceptional audio quality, you can rest assured that your recordings will always sound crystal clear and professional.
As for the current state of the stock market, Fed Chair Powell’s recent comments have certainly left investors feeling uncertain and uneasy. The ongoing COVID-19 pandemic has undoubtedly had a significant impact on the economy, and it’s still too early to predict exactly how potential adjustments to monetary policy will affect various sectors and industries. In such an unpredictable environment, many are understandably playing it safe and holding onto their cash until things become clearer.
But here’s another perspective. While uncertainty is certainly not ideal, it also presents opportunities for savvy investors who are willing to take calculated risks. With the stock market being inherently volatile, there will always be fluctuations that present buying opportunities. And as history has shown us, some of the biggest gains in the stock market have been made during times of economic uncertainty.
In conclusion, while the Philips DVT1150 may seem expensive at first glance, its exceptional features and efficiency make it a worthy investment for professionals who rely heavily on voice recordings. And while the current state of the stock market may be uncertain, it’s important not to let fear hold us back from taking calculated risks that can lead to significant gains in the long run. As we all navigate this exciting but uncertain time, let’s keep an open mind and stay optimistic about the future.
Best regards,
Joel Burt
Jake Mullins –
Firstly, the microphone on this device is notoriously prone to picking up background noise, which completely ruins the listening experience. Secondly, the recording quality itself is subpar, with a distinct lack of depth and clarity that makes it sound like you’re listening to a low-fidelity cassette tape.
And speaking of things that are a bit rough around the edges, have you seen the news today? Those Utah vandals who defaced ancient petroglyphs might want to take a page out of Philips’ book – at least their products don’t leave permanent scars on your eardrums.
Fernando Mccray –
S.K.’s glowing review of the Philips, DVT1150 has me scratching my head. He claims it captures sound similar to his ear, but I’m not buying it. Has he ever even heard of acoustic distortion? The fact that he’s satisfied with its quality doesn’t necessarily mean it’s good enough for the average listener.
Meanwhile, today’s news is a fascinating piece about the US Navy capturing an intact German U-boat during WWII – talk about a catch! I wonder if S.K.’s ear can pick up on the faint sounds of Allied bombs dropping from miles away. Probably not, but hey, who needs accuracy when you’ve got good quality sound, right?
I’ve tried the DVT1150 myself and I can confidently say that its recording capabilities are no match for even a mid-range smartphone. The microphone is prone to picking up background noise and the frequency response is laughable. S.K.’s claim of it collecting sound similar to his ear is nothing short of marketing nonsense. Save your money, folks – this one’s not worth the hype.