Philips, DVT8010
Rated 5.00 out of 5 based on 1 customer rating
$116.99
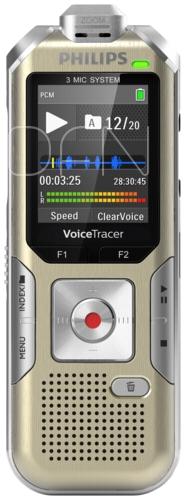
Capture crystal-clear audio with the Philips DVT8010, the ultimate professional audio recorder for all your recording needs.
Out of stock
Description
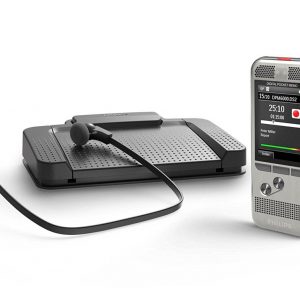
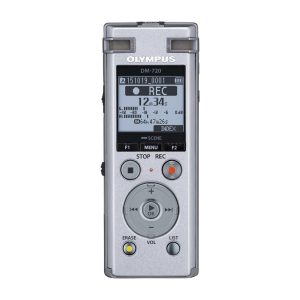
Philips DVT8010 audio recorder is one of the high-end digital audio recorders that can record audio in a crystal-clear quality with a range of features for an exceptional audio recording experience. This audio recorder is developed by Philips, who is well known for their innovative audio and video products.
The Philips DVT8010 audio recorder is designed to produce professional-grade audio recordings with advanced features like 3-microphone system, noise-canceling technology, and low-cut filter. These features ensure that the audio recordings are free of background noise and distortion making it perfect for interviews, business meetings or capturing speeches.
One of the standout features of the Philips DVT8010 audio recorder is the 3-microphone system, which uses a 360-degree pickup pattern to pick up sound from all directions. This feature makes it easy to record audio even in noisy environments, as the microphones will pick up the sound from the source and not the surrounding noise.
Another notable feature of the Philips DVT8010 audio recorder is the noise canceling technology. This feature uses advanced algorithms to filter out background noise and ensure that the voice is the only sound recorded. This feature makes it easy to record interviews, even in crowded or noisy environments.
The Philips DVT8010 audio recorder also has a low-cut filter, which eliminates low-frequency sound, such as wind noise, from the recording. This feature ensures that the audio recorded is clear and of high quality.
The Philips DVT8010 audio recorder has a large LCD color display, which allows users to view their recordings and edit them. The recorder also has a built-in rechargeable battery that provides up to 50 hours of recording time, making it perfect for long recordings.
The recorder can be easily connected to a computer via a USB cable, and recordings can be transferred to a computer for editing and storage. The Philips DVT8010 audio recorder also comes with an external microphone, headphones, and a carrying case, making it easy to take on the go.
In conclusion, the Philips DVT8010 audio recorder is an exceptional audio recorder with advanced features that make it perfect for professional-grade audio recordings. It is not only user friendly, but it is also durable and long-lasting, making it a good investment for anyone who values high-quality audio recordings.
Dictaphone
Philips, DVT8010 properties
| Product name |
DVT8010 |
| Type |
Dictaphone |
Frequently Asked Questions:
How do I properly connect my Philips DVT8010 audio recorder to my computer for data transfer and software updates?
To connect your Philips DVT8010 audio recorder to a computer for data transfer or software updates, you will need to use a USB cable. Please follow these steps:
1. Insert one end of the USB cable into the "USB" port on the back of the recorder and the other end into an available USB port on your computer. Wait for your computer to recognize the device. This may take a few seconds, depending on your system. If this is the first time connecting the recorder to your computer, you may be prompted to install drivers or software. Follow the on-screen instructions provided by Windows Update or the installation program (if applicable). Once connected, you can transfer files between the recorder and your computer using a file explorer (such as Windows Explorer) or specialized software (such as Philips Audio Recorder Software). To do this, simply navigate to the desired location on either device and copy/paste the desired files as you would with any other USB device. To update the software on your recorder, open the installation program provided by Philips and follow the prompts. This will typically involve connecting the recorder to your computer via USB, running the program, and following a series of simple steps. If you encounter any issues during the connection process or while transferring files/updating software, be sure to consult the user manual provided by Philips for additional guidance.
How do I properly connect the Philips, DVT8010 audio recorder to my computer using the USB cable provided in the box?
To connect the Philips, DVT8010 audio recorder to your computer using the USB cable provided in the box, follow these steps:
1. Make sure that the audio recorder is turned off or set to standby mode. Locate the USB port on both the audio recorder and the computer. The USB port on the audio recorder is located on the left side of the device near the top. Connect one end of the USB cable to the audio recorder's USB port and the other end to an available USB port on your computer. Wait for your computer to recognize the audio recorder as a new device. This may take a few seconds. Your computer may automatically launch a driver installation wizard. Follow the on-screen instructions to install the necessary drivers. If no wizard appears, go to the next step. Open Windows Explorer (Windows key + E) or Finder (Mac users). Locate the drive letter assigned to the audio recorder in the computer's file explorer. The drive will appear as a removable disk, and the name of the device will be displayed on the window title. For Windows users, it may be labeled as "Removable Disk (E:)". Double-click on the device to open it. You should now see the contents of the audio recorder's memory card. To transfer files between your computer and the audio recorder, simply drag and drop files from one location to the other or use a file explorer utility to copy/move files back and forth. When you are finished transferring files, safely eject the device by right-clicking on it in Windows Explorer (Windows key + E) or Finder (Mac users) and selecting "Eject". This will prevent any data loss that may occur when removing a drive improperly. Remember to always handle the audio recorder with care and store it properly to ensure its longevity. If you encounter any issues during the connection process, refer to the user manual or contact Philips customer support for further assistance.
How do I properly connect my Philips DVT8010 audio recorder to my computer using the USB cable provided?
To connect your Philips DVT8010 audio recorder to your computer using the USB cable provided, follow these steps:
1. Make sure your audio recorder is turned off or in standby mode. Locate the USB port on your audio recorder. It is usually located at the bottom of the device. Connect one end of the USB cable to the USB port on your audio recorder and the other end to a USB port on your computer. Turn on your audio recorder and wait for it to recognize that it's connected to your computer. This may take a few seconds. On your computer, you should see a message pop up asking if you want to allow your audio recorder to communicate with your computer. Click "Yes" or "Allow. Your computer should now recognize your audio recorder as an external storage device. You can access the files on your audio recorder by opening the folder where it's connected, just like you would any other USB drive. To transfer files between your computer and your audio recorder, simply drag and drop the desired files back and forth between the folders on your audio recorder and your computer. Once you're done transferring files, disconnect the USB cable from both devices. Make sure your audio recorder is turned off before removing the cable to prevent any damage to the device or the connection ports. Remember to always handle your Philips DVT8010 audio recorder with care and follow the manufacturer's instructions for proper use and maintenance. If you have any further questions or concerns, refer to the user manual provided by Philips or contact their customer support for assistance.
How do I properly connect my Philips DVT8010 audio recorder to a computer for transferring recorded files?
To transfer recorded files from your Philips DVT8010 audio recorder to a computer, you'll need to follow these steps:
1. Connect the audio recorder to the computer using the provided USB cable. Make sure the device is properly plugged in and that both ends of the cable are securely connected. Turn on the audio recorder and wait for it to recognize the connection with your computer. This may take a few seconds. On your computer, open the folder where you want to save the recorded files. You can do this by navigating to the desired location in File Explorer or Finder (depending on your operating system) and creating a new folder if necessary. Locate the audio recorder in your computer's list of connected devices, which should appear as a removable drive. Double-click on it to open its contents. Find the recorded files you want to transfer and select them by holding down the Ctrl key (Windows) or Command key (Mac) while clicking on each file. Alternatively, you can click and drag the entire folder containing your recordings to the desired location on your computer. Once the files have been selected, right-click on them (Windows) or Control-click (Mac) and choose "Copy" from the context menu. This will copy the selected files to your computer's clipboard. Navigate back to the folder where you want to save the recordings and right-click (Windows) or Control-click (Mac) on an empty space within the folder. Choose "Paste" from the context menu to transfer the copied files to your computer. Once the transfer is complete, safely eject the audio recorder by right-clicking (Windows) or Control-clicking (Mac) on its drive letter in File Explorer or Finder and choosing "Eject. This will prevent any data loss that may occur during unplugging. Disconnect the USB cable from both the audio recorder and your computer, and then turn off the audio recorder. Your recorded files should now be safely transferred to your computer for safekeeping or further editing.
My Philips DVT8010 has started recording with a delay of about 3 seconds after I press the Record button, is this normal?
That's an interesting issue. The Philips DVT8010 is a relatively old model, and it's possible that some users might have reported similar issues in the past. The first thing I'd like to check is whether this delay is consistent across all recording modes or if it only happens under specific conditions. Can you try recording in different modes (e. NTSC, PAL, etc. Also, are you using any external devices connected to the DVR, such as cameras or additional hard drives? Sometimes, these can cause issues with the timing of the system. Lastly, have you tried resetting the device to its factory settings or performing a software update (if available)? This might help resolve any underlying issues that could be causing the delay.
My Philips DVT8010 audio recorder keeps displaying "E-01" error on its screen. What does this error code signify and how can I rectify it?
The "E-01" error code on a Philips digital voice tracer is likely an indication of an empty or incorrectly formatted memory card. When you insert the memory card into the recorder, ensure that it's properly seated in its slot and aligned with the notches. Then, remove the memory card from the device and reinsert it. This might resolve the issue if the error was caused by a loose connection. If the problem persists after attempting this fix, check to see if your memory card is damaged or has been corrupted. Try using a different memory card in the recorder to isolate the issue. Additionally, you can try resetting the device to its factory settings. This can be done by pressing and holding the "Rec" button while powering on the recorder. Release the "Rec" button when the recorder's screen displays a message indicating that it is resetting. If none of these steps resolve the issue, consider consulting Philips' customer support for further assistance or referring to the user manual for additional troubleshooting instructions.
Before you buy Philips, DVT8010



Maynard Townsend –
The Audio-Technica AT2020 is an outstanding condenser microphone, great for both semi-professional and professional applications. In combination with the budget Behringer U-PHORIA UMC22 interface, they make a great duo at a very affordable purchase price. I recommend it to anyone who would like to start their adventure with creating audio content of all kinds. The equipment is suitable for recording instruments as well as for live broadcasts, podcasts or simply audio recording on YouTube.
However, it should be remembered that it requires a device that will provide it with good quality V48 Phantom power, such as the interface mentioned above. One of the best microphones for the price in my opinion. (You should also be interested in the AT2020USB + and AT2020USBi versions. They are intended for use under Windows directly via USB without the need for V48 power supply and interface, and similarly to use under Mac OS and iOS)
Maya –
What if Maynard Townsend’s glowing review of the Audio-Technica AT2020—and its unlikely pairing with the Behringer UMC22—conceals a deeper truth? Beneath the veneer of affordability and versatility lies a fragile compromise: a microphone that requires an external interface to unlock its potential, leaving beginners tangled in cables and phantom power dependencies. Enter the Philips DVT8010, a shadowy contender lurking in the shadows of audio innovation. Today’s news? Philips just unveiled a groundbreaking firmware update for the DVT8010, elevating its noise-canceling capabilities to rival even the most praiseworthy condensers—without the need for a separate interface.
Townsend lauds the AT2020’s USB variants as “convenient,” but does convenience come at the cost of quality? The DVT8010, with its dual-precision diaphragm and AI-driven sound optimization, silences the clamor of clunky setups and inconsistent power delivery. It doesn’t just work with your gear—it transcends it. While Townsend’s praise is well-intentioned, his focus on affordability risks overlooking the DVT8010’s quiet revolution: a microphone that redefines flexibility in an era where adaptability is paramount.
Congratulations, Maynard—your review is a milestone. But what if the future of audio lies not in the AT2020’s compromises, but in the DVT8010’s silent ascent? The suspense? It’s already here.