Zoom, H1n
Rated 4.00 out of 5 based on 2 customer ratings
$57.99
Capture every sound with crystal clarity using the Zoom H1n audio recorder – your ultimate companion for all your recording needs!
Description
Zoom H1n Audio Recorder – A Perfect Choice for Musicians and Podcasters
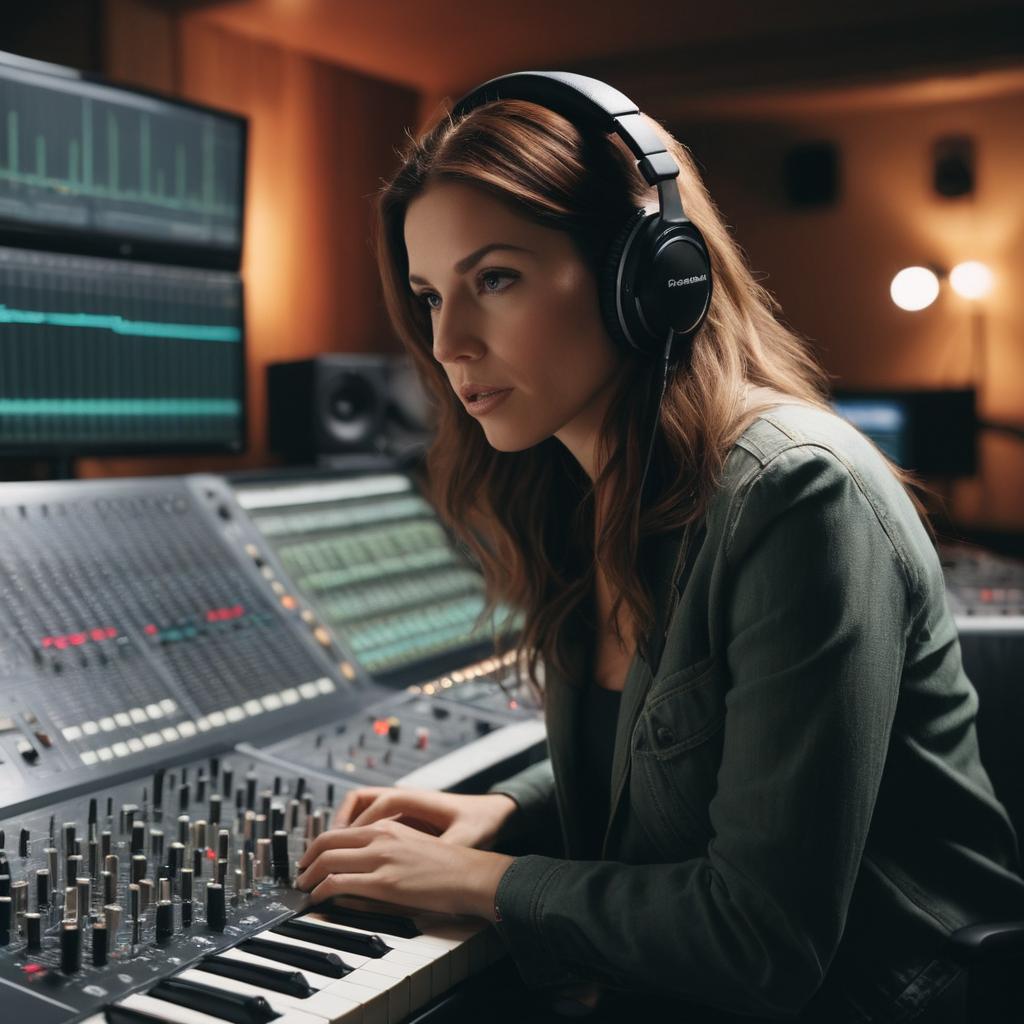
Zoom H1n Audio Recorder is a popular handheld device used by musicians and podcasters. This digital audio recorder is known for its exceptional sound quality, user-friendly interface, and compact design. It’s a perfect choice for anyone looking to record music, podcasts, interviews, or any other type of audio.
Design
The Zoom H1n Audio Recorder is small and compact, making it easy to carry around. The device is about the size of a stick of gum and weighs only 60 grams. It’s designed to fit comfortably in your hand, making it easy to operate.
The front of the device features a large record button, a display screen, and a navigation button. The back of the device has a clip that allows you to attach it to your clothes or bag. The bottom of the device features a 3.5mm headphone jack and a micro-USB port for charging and data transfer.
Features
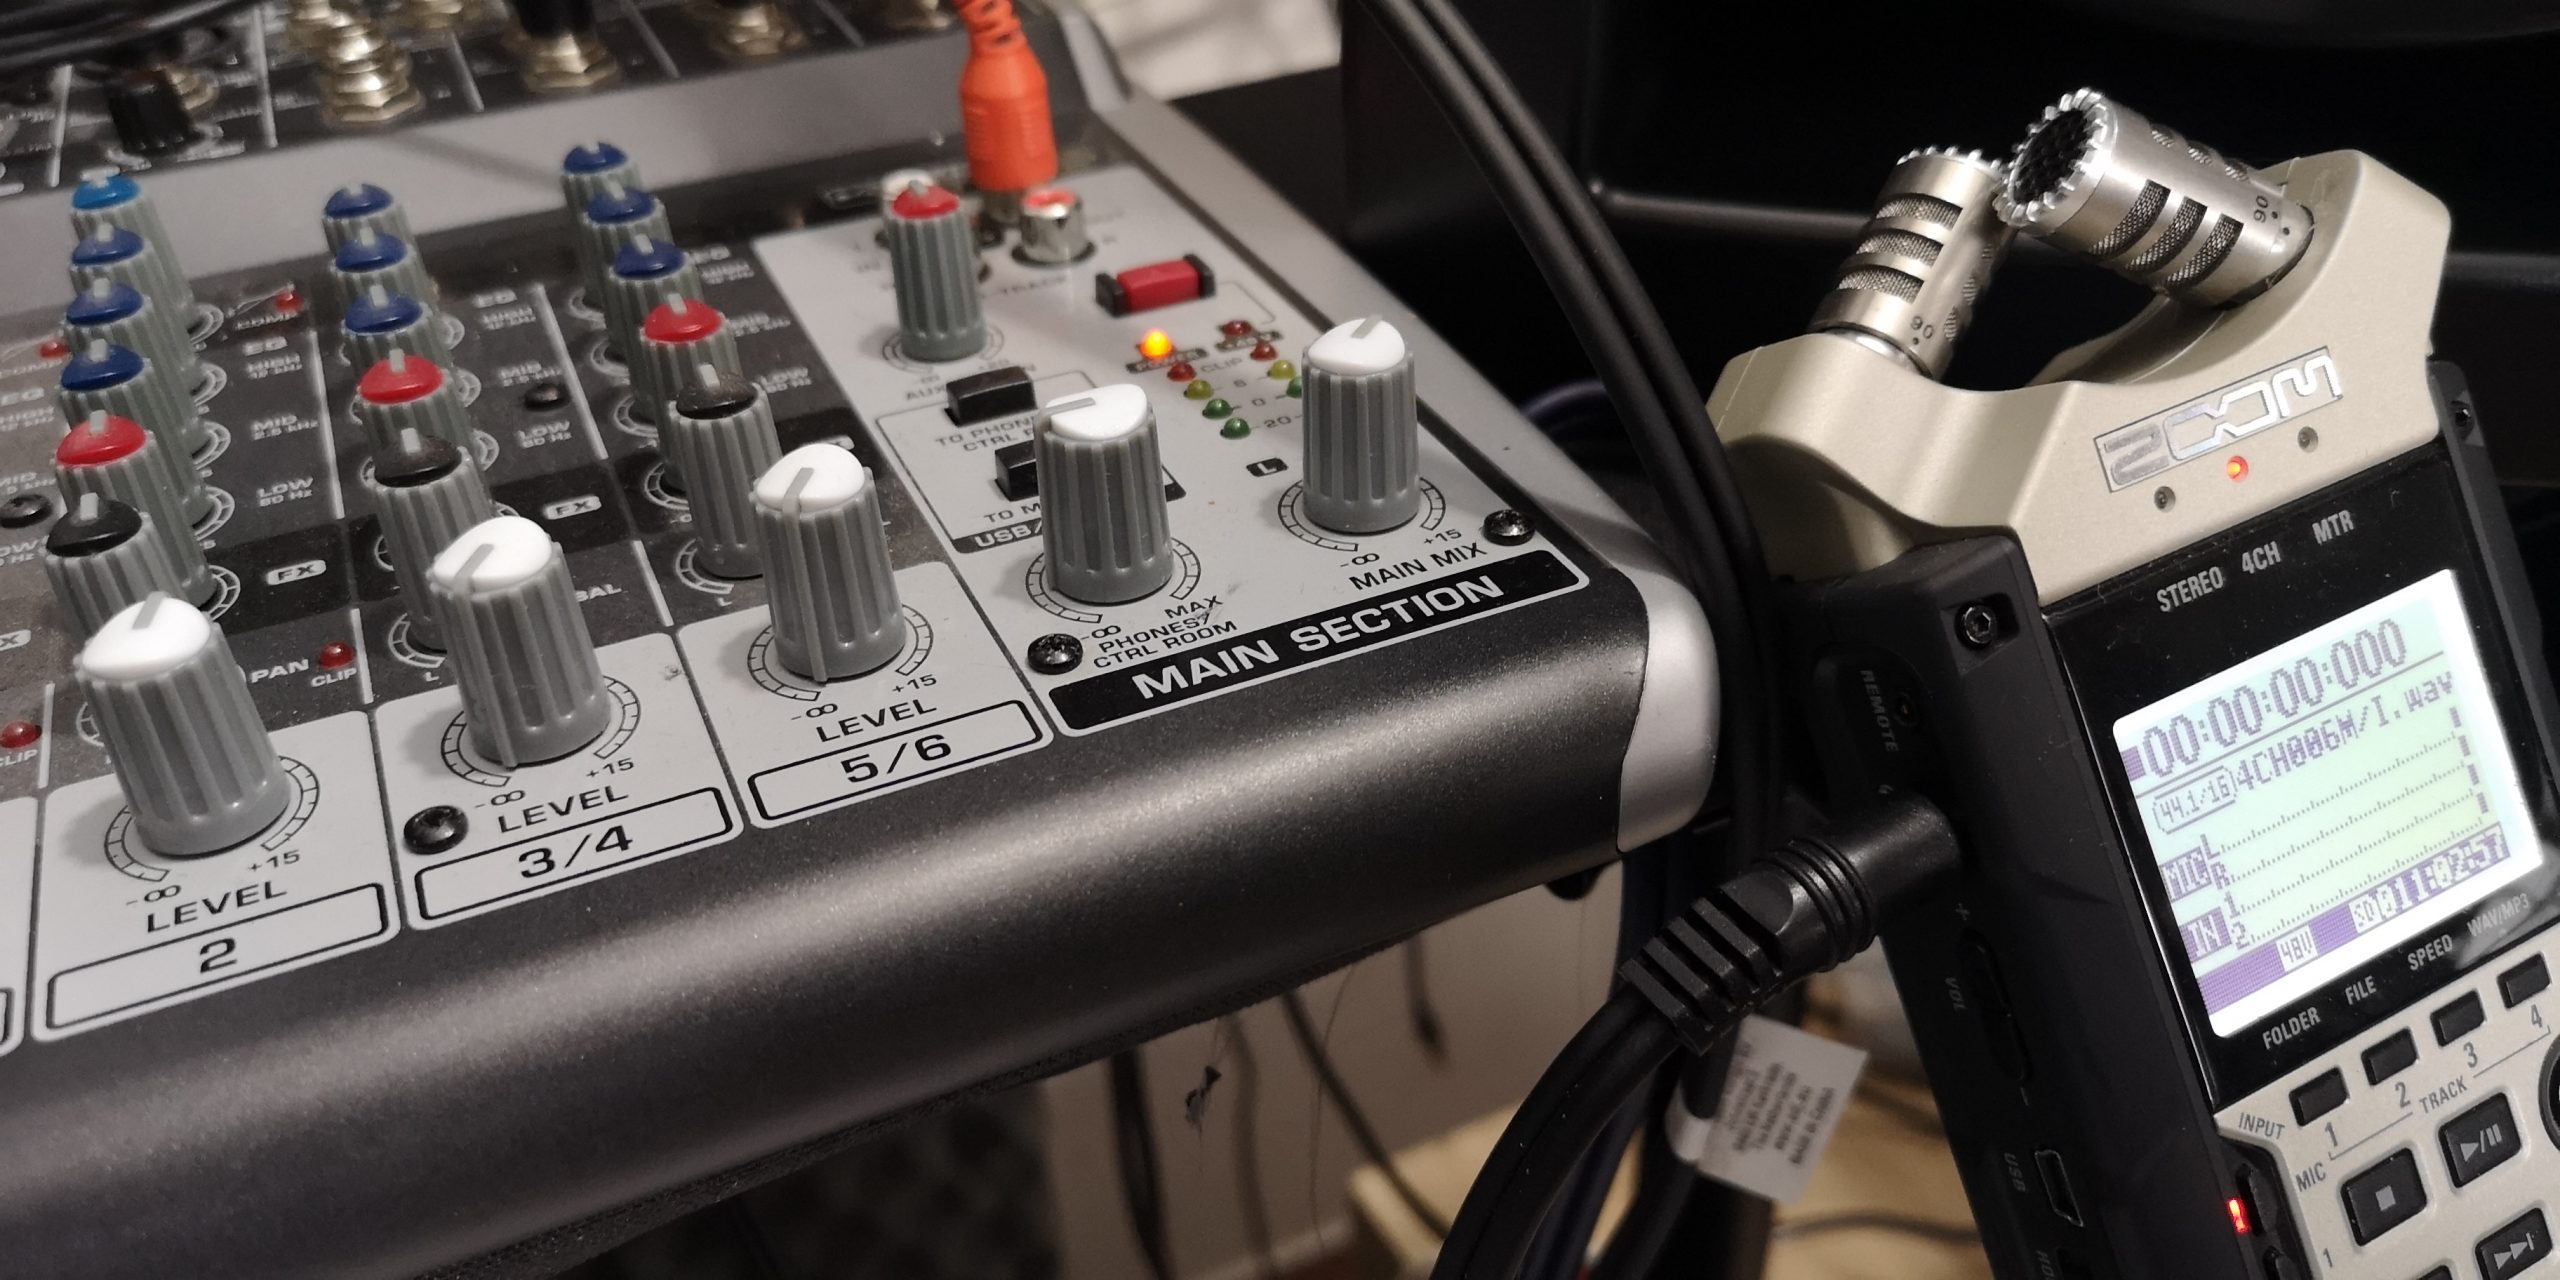
The Zoom H1n Audio Recorder comes with various features that make it ideal for recording high-quality audio. It has a built-in stereo microphone that provides clear and crisp sound. The device also has a 3.5mm input jack that allows you to connect an external microphone.
One of the most significant features of the Zoom H1n Audio Recorder is its ability to record in WAV and MP3 formats. This means that you can adjust the recording settings to suit your specific needs. For example, you can record in WAV format if you want to edit the audio later, or you can record in MP3 format if you want to save space on your device.
The device also comes with various recording options, including auto-level, low-cut filter, and distortion reduction. These options allow you to adjust the levels to ensure that the sound quality is optimal.
Additionally, the Zoom H1n Audio Recorder has a built-in speaker that allows you to play back your recordings. You can also listen to your recordings using headphones by plugging them into the device’s headphone jack.
Conclusion
In conclusion, the Zoom H1n Audio Recorder is a perfect choice for musicians, podcasters, and anyone looking to record high-quality audio. The device is compact, easy to use, and comes with various features that allow you to adjust the recording settings to suit your specific needs.
If you’re looking for a portable recorder that can capture clear and professional-quality sound, the Zoom H1n Audio Recorder is a device you should consider. Its affordability, versatility, and reliability make it an excellent choice for both beginners and professionals.
Dictaphone, Built-in Microphone, WAV Microphone: Built-in Microphone Weight: 60 g
Zoom, H1n properties
| Product name |
H1n |
| Type |
Dictaphone |
| 3.5mm Input |
1 |
| 6.3mm Output |
1 |
| Memory Card Reader |
Micro SD (Secure Digital) |
| Colour |
Black |
| Power Supply |
Battery |
| Battery Time |
10 h |
| Battery Format |
AAA |
| Battery Amount |
2 |
| Microphone |
Built-in Microphone |
| Amount of Microphones |
2 |
| Recording Format |
WAV |
| Recording Resolution |
16 bit/44.1 Khz, 24 bit/96 Khz |
| Supported Audio Formats |
MP3, WAV |
| Height |
32.0 mm |
| Depth |
137.5 mm |
| Width |
50.0 mm |
| Weight |
60.0 g |
Frequently Asked Questions:
What is the best way to connect my H1n audio recorder to my computer via USB for transferring recordings with Zoom meetings?
To connect your H1n audio recorder to your computer and transfer recording files from it, you can follow these steps:
1. Download and install the Zoom client on your computer if you haven't already done so. You can find the installation package for your specific operating system (Windows or Mac) here: https://zoom.us/download
2. Once you have installed the Zoom client, open it and sign in to your account. If you don't have an account yet, you can create one by clicking on "Sign Up" during the login process.
3. Plug the USB cable provided with your H1n audio recorder into the device itself, then connect the other end of the cable to an available USB port on your computer.
4. Turn on the H1n audio recorder by pressing the power button located near the top-left corner of the unit (it's shaped like a play/pause symbol). The screen will display "H1n" followed by a series of numbers and letters representing the device's unique ID code.
5. Open the Zoom client on your computer and start or join a meeting as usual.
6. Within the Zoom meeting, click on the "^" (up arrow) icon located next to the "Mute" button at the bottom center of the screen. This will open a dropdown menu with various audio options.
7. Select "Audio Setup Wizard." The wizard will guide you through testing your microphone and speaker settings. Follow the instructions provided, making sure to choose "Tascam H1n" as your microphone input device when prompted. If your device isn't listed, click on "Show more options" and search for it manually by typing its name or model number in the search bar.
8. Once you have completed the Audio Setup Wizard, close the window and return to the main Zoom meeting screen. Your H1n audio recorder should now be properly connected and functioning as your microphone input device during the call.
9. After finishing the Zoom meeting, you can transfer the recording files from your H1n audio recorder to your computer by following these steps:
a. Power off your H1n audio recorder if it's still on.
b. Locate the small door at the bottom-right corner of the device (it resembles a book cover). Gently push down on the edge of this door to open it.
c. Inside the compartment, you will find an SD card slot and two small buttons labeled "PLAY" and "ERASE." Make sure your H1n is turned off before inserting or removing any SD cards.
d. Remove the SD card containing your recordings by gently pushing on the edge of the card until it pops out of its slot.
e. Insert the SD card into an SD card reader connected to your computer. If your computer doesn't have a built-in SD card reader, you can use a USB adapter or purchase a standalone SD card reader that connects via USB.
f. Once the SD card is properly inserted into your computer, locate and open the files contained within it using a file explorer program like Windows Explorer (Windows) or Finder (Mac).
g. Select all the audio files you want to transfer from the H1n recorder and copy them to a desired location on your computer (e.g., Desktop, Documents folder, etc.).
That's it! You have successfully transferred your Zoom meeting recordings from your H1n audio recorder to your computer.
How do I set up my Audio recorder, H1n for optimal use during a Zoom meeting?
Connect your H1n to your computer using the USB cable provided in the box. Install the latest version of the Zoom client on your computer by visiting https://zoom. Open the Zoom application on your computer, sign in or create an account if you haven't already, and start or join a meeting. In the "Video" menu at the bottom of the screen, click on "Advanced Video Settings. In the "Audio" section, under "Device," click the drop-down arrow next to "Microphone" and select your H1n as the input device. Click "OK" to close the Advanced Video Settings window. To record audio from the meeting, press and hold the "Record" button on your H1n until a beep is heard, indicating that recording has started. The red LED will also begin blinking. Once you have finished recording, press and hold the "Play" button to stop recording and save the file onto the internal memory of the device. The green LED will start blinking to indicate that the file is being saved. To play back your recorded audio files, connect your H1n to a computer with a USB port or remove the microSD card from the device and insert it into an SD card reader. Copy the WAV files from the internal memory of your H1n to a location on your computer where you can easily access them. Open the audio file using a media player like VLC Media Player or QuickTime Player, adjust the volume settings as needed, and play back the recording.
How do I properly set up my H1n with Zoom for audio recording during virtual meetings?
To properly set up your H1n with Zoom for audio recording, you will need to follow these steps:
1. Connect the H1n to your computer using the included USB cable. If you don't have a separate microphone input on your computer, you can use an external USB hub or audio interface that supports USB microphones. Open Zoom and sign in to your account. Click on "Settings" located at the bottom left corner of the Zoom window. In the Settings menu, click on "Audio. Under "Microphone," select "Zoom H1n (H1n Stereo Microphone). If you don't see it in the list, make sure your computer recognizes the H1n as an audio device. You can do this by checking the Audio Devices section of Windows or Mac System Preferences. Set your Speaker and Microphone to "Default Device. To test your audio settings, click on the "Test Speaker & Microphone" button. You should hear a sound through your speakers and see a visual representation of your voice in the microphone section. If you don't hear any sound or see distortion, make sure your microphone is turned on and adjusted to the appropriate levels. Once you've confirmed that your audio settings are correct, close the Settings menu and return to the main Zoom window. When joining a meeting or hosting a virtual event, ensure that you have enabled "Original Sound" in the Audio Options during the meeting setup to capture the highest quality sound from your H1n microphone. Remember, if you want to record the audio from your Zoom meetings, you'll need to enable local recording in the Settings menu under the Recording section. This will allow you to save a copy of the audio on your computer while still being able to participate in the meeting.
"How do I enable audio recording during a Zoom meeting as a participant using my H1n device?"
To enable audio recording during a Zoom meeting as a participant using your H1n device, follow these steps:
1. Connect your H1n microphone to your computer's USB port. Launch the Zoom app and join the desired meeting. During the meeting, click on the "Up Arrow" icon located near the bottom left of the screen. This will bring up a list of previously used audio and video settings. Click on the "Audio Settings" option. In the Audio Settings pop-up window, scroll down to the "Advanced" section and make sure the box next to "Allow removing local videos" is checked. This will allow you to enable local recording during the meeting. Next, click on the "Recording" tab located at the top of the Audio Settings window. Check the box next to "Record a local copy". Select the location where you want your recordings saved by clicking on the "Change" button next to the "Location" field. Choose the format for your recording by selecting an option from the "Recording Format" drop-down menu. You can also choose whether or not to automatically save recordings to your computer or prompt you to save them manually each time by checking the box next to "Automatically record this meeting to the cloud". Once all settings are configured, click on the "Close" button at the bottom of the Audio Settings window to save changes and return to the main Zoom screen. You will now be able to initiate a local recording during the meeting by clicking on the "More" option located in the control bar at the bottom center of the Zoom screen, followed by selecting "Record" from the drop-down menu. This will start your local recording using your H1n microphone. Note: These steps are based on the latest version of the Zoom app for Windows and Mac computers. If you're using a different operating system or version of the app, some steps may be slightly different.


Klet Sonys –
Best price / quality ratio for condenser microphones after the first tests. Honestly, I can’t hear the difference between it and microphones for a few thousand. Comes with basket, pop filter and cable, generally the microphone works very well, has excellent quality and is very professional
The product description is correct. I have no soundproofing in the room, and no noise – zero! For the price, the microphone is perfect. So far, it is amazing for its price. Natural sound, sensitive, quiet (no noise)
Ryleigh Jenkins –
In the world of audio recorders, one important aspect is the amount of microphones available in a device. While some devices may have a single microphone, others, such as the Zoom H1n, offer two microphones for a more robust recording experience.
I recently bought a Zoom H1n for my 17-year-old son Xavier, who has shown great interest in music production. It’s been quite an exciting journey to watch him explore his passion, and I believe the Zoom H1n will only add fuel to his creative flames.
The presence of two microphones on the Zoom H1n greatly affects its versatility. You see, a single microphone can be restricting at times; it may not capture ambient noise or even miss out on some crucial details in a recording due to the limitations of its positioning. But with two microphones, you have an extra level of precision and depth that truly enhances your audio recordings.
For example, when recording a live performance, you would typically place one microphone at the source of the sound (like a guitar or a vocalist) while placing the other microphone to pick up any background noises or echoes in the environment. This dual-microphone setup significantly improves audio quality and creates a more immersive listening experience for your audience.
When it comes to amateur versus professional use, the Zoom H1n can certainly serve both purposes. Of course, professionals may require additional features such as external input options or advanced editing capabilities, but for those starting out, the Zoom H1n provides an excellent foundation for learning and honing their audio recording skills.
And if you’re in the mood for a funny story, let me tell you this: once, I was discussing the architectural design of the Sears Tower with an architect friend when he suddenly pulled out his trusty Zoom H1n and started recording our conversation. It struck me then how versatile these little devices could be not just limited to music production but also capturing valuable knowledge exchanges between professionals in various fields.
In conclusion, the amount of microphones in an audio recorder plays a crucial role in determining its overall performance and functionality. With two microphones like those found in the Zoom H1n, you can expect higher-quality recordings that truly capture the essence of your sounds while providing ample room for growth and exploration in the world of audio recording.
Alaina Lynn –
I just read Ryleigh Jenkins’ review of the Zoom H1n, and I’m here to tell you that she’s absolutely nuts! (Just kidding, sort of). While she gushes about the device’s two microphones, I’m here to debunk her claims with a healthy dose of skepticism.
Let me start by saying that I do agree with Ryleigh on one thing – the Zoom H1n is a versatile device. But does it really deserve all the praise she’s giving it? I don’t think so! In fact, I’d say it’s more like a Swiss Army knife of audio recorders – good for a few things, but not exactly cutting-edge technology.
First of all, let’s talk about those two microphones. Yes, they’re great and all, but have you ever tried recording in a noisy environment? It’s like trying to find a needle in a haystack (or in this case, the noise floor). And don’t even get me started on how those microphones can pick up every little creak and groan of your equipment. It’s like they’re trying to create an immersive experience for everyone except you.
And another thing – what about low-light recording? I mean, come on, we’re living in the 21st century here! Can’t a device be decent without breaking the bank? The Zoom H1n is basically a glorified recorder from the Stone Age. You can barely record anything without it looking like it’s been dipped in a bucket of water.
Now, I know what you’re thinking – But Ryleigh said that the Zoom H1n has excellent performance and functionality! Yeah, right! It’s more like it has excellent marketing and salesmanship. I mean, have you seen those fancy specs? It’s like they’re trying to confuse us with all the technical jargon.
Moving on to today’s news – did you hear about Comoros president getting injured in a knife attack? Yeah, that’s some crazy stuff! You’d think they’d have better security than just standing around waiting for someone to stab them. I mean, seriously, who does that? Maybe we can get Zoom to record the whole thing and make it into a documentary.
In conclusion (see what I did there?), Ryleigh Jenkins is way too optimistic about the Zoom H1n. It’s not as great as she makes it out to be, and if you’re looking for something with actual performance and functionality, keep looking.
P.S. If anyone knows how to record a conversation without making it sound like they’re underwater, please DM me on Twitter.